Table Of Content

These houses took several gatherings, one to make the dough and the pattern pieces, one to roll out the dough and bake the pieces, one to assemble the pieces, one to decorate. FYI, if your stand mixer has an 11 lbs or higher dough capacity (like the Ankarsrum which is what I used), it will be able to hold the whole recipe in a single batch. But it was at the limit, so an even slightly smaller mixer probably wouldn't work. I had a hard time portioning and rolling out the dough until it had been at room temperature for at least 15 minutes, at which point it became much easier.
Chocolate Mayonnaise Cake
Stand up two walls at a time so they support each other. Starting with an end wall and side wall, pipe a thick L-shaped line of icing on the prepared base to secure the bottoms of the two walls. Place another line of icing where the walls meet. Use your hands or a sturdy object like a can or box to support the walls while they set. With royal icing, this should only take a few minutes.
What You’ll Need
Alternatively, you can use melted chocolate to stick the gingerbread house pieces together. Chocolate will harden faster than royal icing, but it might be a little more messy to work with. If you don’t want to make one from scratch, you can find a 26.4-ounce Gingerbread House Kit on the shelves of Trader Joe’s during the holiday season.
Gingerbread house template
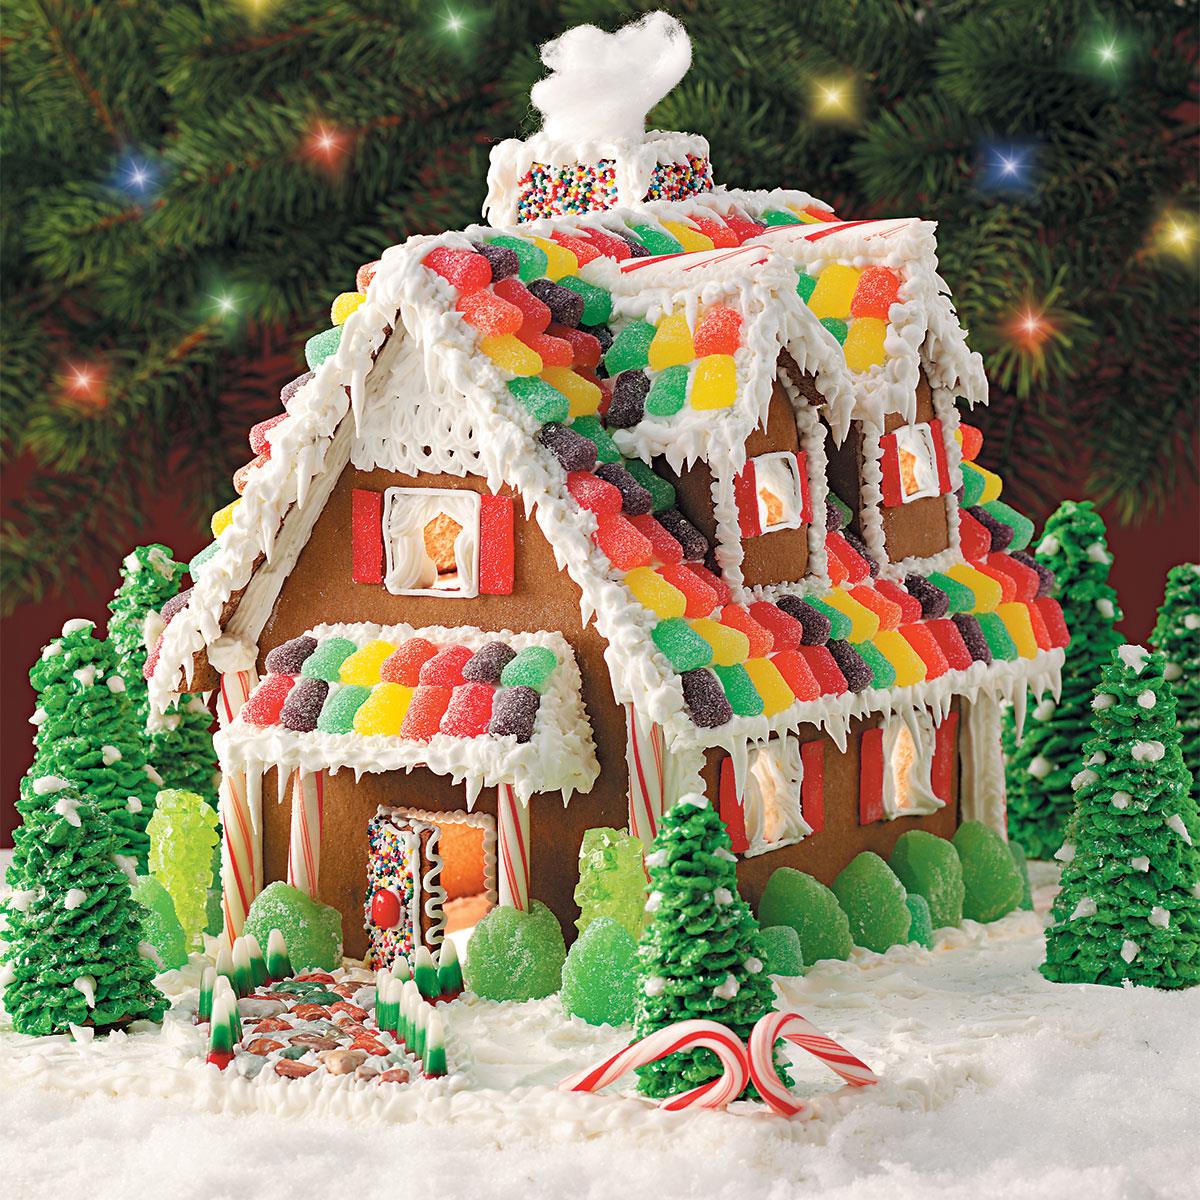
I promise that this no-fail recipe will be one that you will keep around and make every Christmas. If you want clear windows you can use clear sugar-free candies or you can use isomalt. I like to buy mine pre-cooked and ready to melt from simi cakes and confections. Or you can make your own isomalt from raw granules by using my clear isomalt recipe. For my windows I used sugar free jolly ranchers and hard candies in pink, blue and green. I broke them up into smaller pieces with a mallet inside a plastic baggie so the pieces wouldn't go flying.
You can use a cardboard cake board, a large platter or plate, a pretty cookie sheet, a cutting board, or a cake stand. I’m Lauren, a mom of four and lover of good food. Here you’ll find easy recipes and weeknight meal ideas made with real ingredients, with step-by-step photos and videos. Step 17 – Assembling the side walls of the gingerbread house. Choose the base on which you will build the gingerbread house. A cake board works well, but you can also use anything else that is food-safe and flat for a flat surface.
Ever Wonder How Disney World Makes The Giant Gingerbread House? Let’s Find Out - Slurrp
Ever Wonder How Disney World Makes The Giant Gingerbread House? Let’s Find Out.
Posted: Wed, 20 Dec 2023 08:00:00 GMT [source]
Gingerbread House Recipe to Build One Like a Pro
But the taste will be different with blackstrap molasses, as it’s more bitter and salty with a potent molassey / mineral flavor. The icing is one of the trickiest parts to get right. This means it will stay sticky for longer, making more of a mess.
To store your gingerbread house, cover it in a large plastic bag to protect it from dust and store it in a dry, protected place. Use your cookie cutters to make different shapes that you can also stick on or in front of your gingerbread house. My advice is to find a cooler part of your home and allow the icing to harden there. To speed things up, use a hair dryer on its cool setting and on high speed and use the cool air to dry out the royal icing. Do not use warm air as this will melt the royal icing. Pipe more royal icing on the base to stick the front (or back) of the house, perpendicular to the wall (Image 38).
Print out the template and cut out the shapes. The chimney is totally optional, but I think it’s a cute addition. Rich piloncillo, used in place of brown sugar, adds unparalleled depth to baked goods and even savory dishes. This recipe is a super simple one, but it works perfectly. It has the best gingerbread flavor and holds up so well that you can guarantee your house will stay standing long enough to get some pictures before it’s eaten.
Icing/Assembly
You will need two types of royal icing when making the gingerbread house. Step 10 – Place the gingerbread house templates on the dough, and cut the shapes using a craft knife or a small sharp kitchen knife (Images 24 and 25). While the dough is chilling, prepare the gingerbread house template. You can even do this the day before, to save time. Add the flour a little at a time, and mix it in by “pulsing” (turning on the mixer in short bursts) the stand mixer on low speed (Image 9).
We love to make mini gingerbread houses that are perfect to give as gifts, to use as decorations on a hot chocolate platter or dessert board or as mug toppers. Dough was easy to roll and baked up delicately sweet.3. Made my own house design, cutting template pieces from plain 8.5X11 paper.
I was able to hold it on the inside with my fingers and just twist my wrist to work around the cone. Step 3 - Attach the sidewall and place it on a flat surface. Wipe off any excess royal on the outside but the inside should have lots.
I have a gingerbread house pattern that you can use to make your own gingerbread houses. I know it SEEMS very small but once it's assembled, its actually the perfect size for an individual gingerbread house to decorate. One gingerbread house recipe will make three gingerbread houses.
The swathe of bucolic idyll that former creative director Richard Christiansen has carved out for himself on a hilltop in Los Angeles is truly the stuff of dreams. This is a fun family activity that you can do with your kids! Make one big house together, or a few different mini houses. I used the Ateco 352 leaf tip and Ateco 32 star tip to create the different types of branches and leaves on these trees. I recommend starting a little above the base of the overturned sugar cone and working your way up to the top to cover it with icing.
Place the roof panels and support them while the icing sets (again, only a few minutes if you’re using royal icing). Finish with a thick line of icing along the top where the roof panels meet. Allow the icing to fully set in a dry place before adding decorations. This could take a few hours, or overnight.
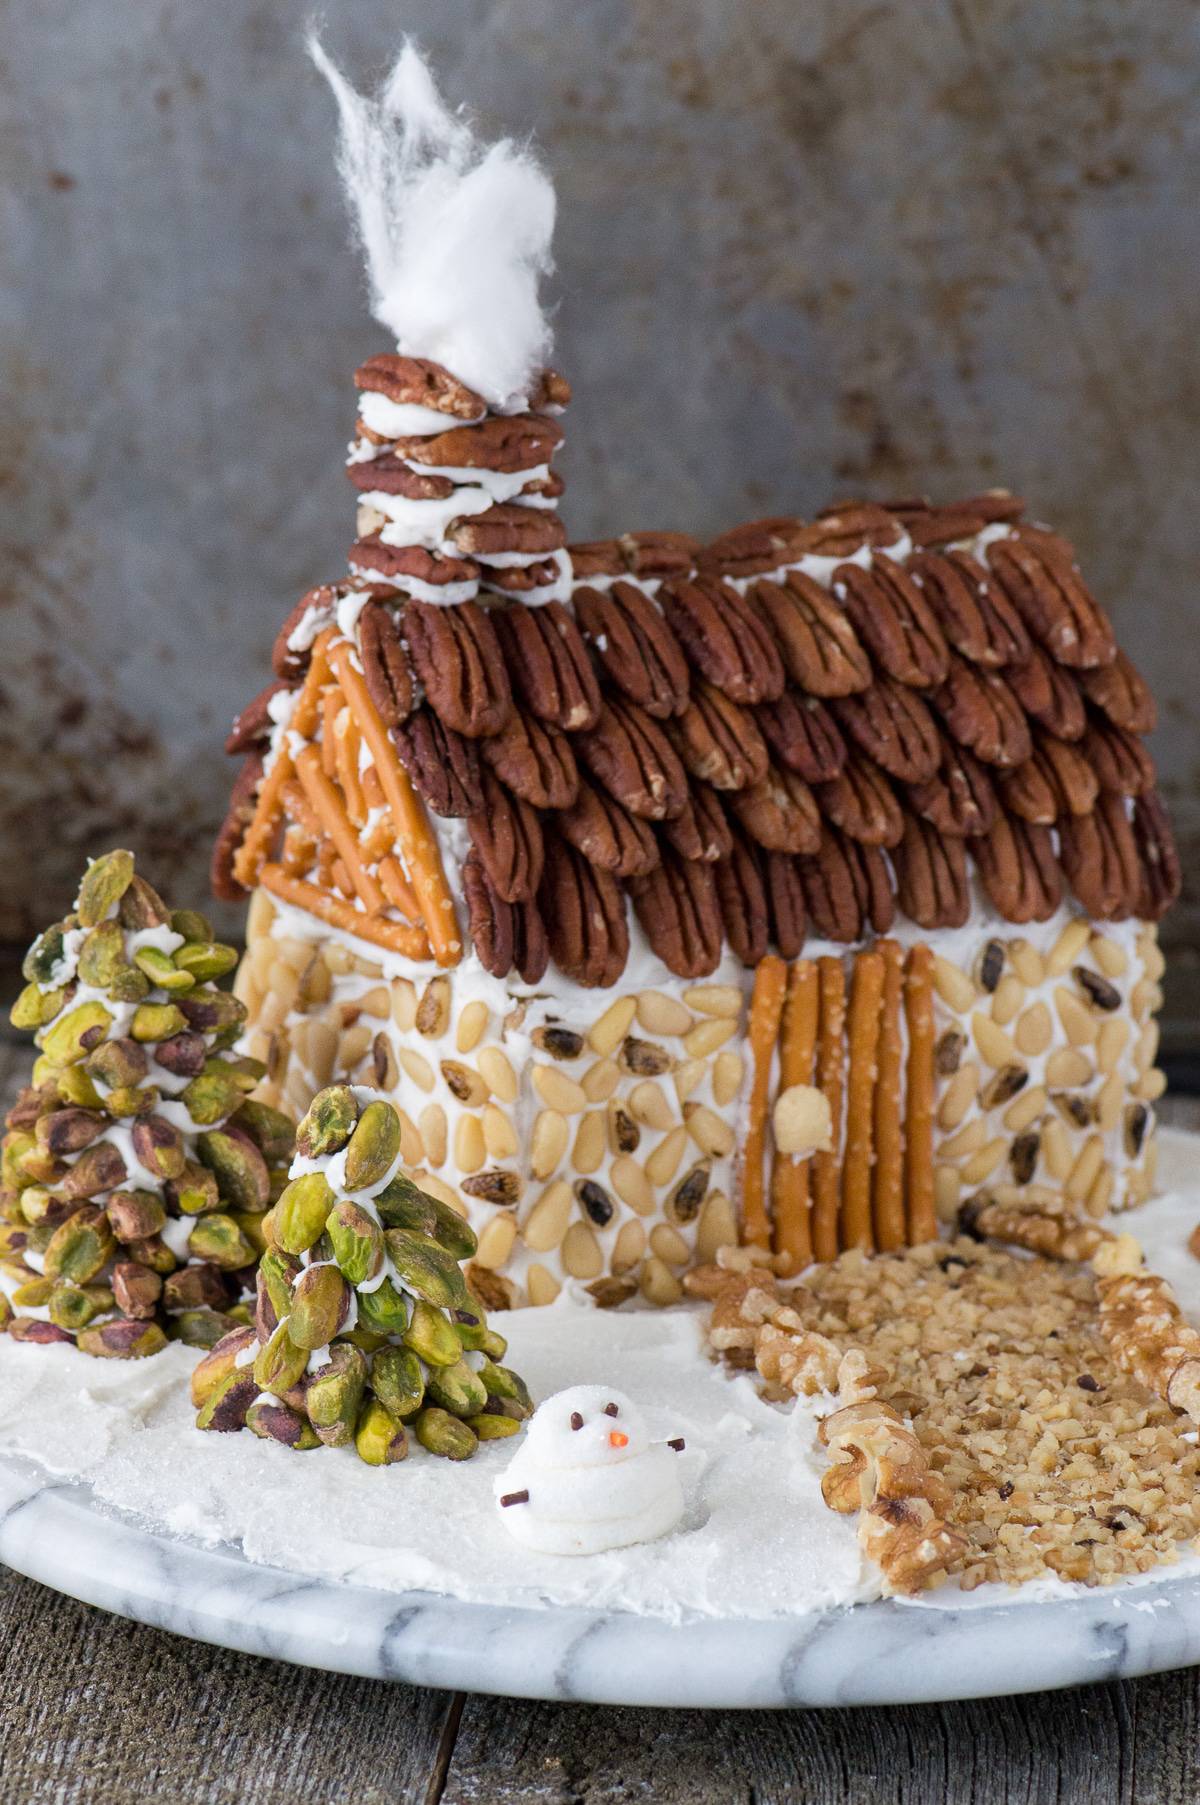
Of course, you can also turn to tools that do all this work for you. These awesome Gingerbread Pop-Out Cutters simplify the design process in a snap. Just roll your dough, cut out two of each shape, imprint the design, and bake — you’ll have a sweet house that fits together perfectly, no math required! It hides crumbs, sprinkles, drips of frosting, etc. and makes the finished project look so nice! Or rely on candy to create a festive winter wonderland scene!


No comments:
Post a Comment